Introduction
How To Melt Crayons Into Molds: Unleash your inner artist and embark on a captivating journey of transforming simple crayons into vibrant works of art through the mesmerizing process of melting them into molds. Whether you seek to breathe new life into old and worn-down crayons or embark on an innovative crafting endeavor, the art of melting crayons into molds offers a world of creative possibilities.
In this comprehensive guide, we delve into the enchanting realm of crayon melting, unveiling step-by-step techniques that unlock your capacity to shape and mold wax into captivating forms. From understanding the ideal crayon types and tools to mastering the art of controlled melting, we provide insights that bridge the gap between imagination and reality. Whether you’re crafting custom crayon shapes for children’s activities or creating intricate artworks, this guide equips you with the skills to harness the fluid potential of crayons and mold them into captivating expressions of creativity. Let the journey of melting crayons into molds begin, and watch as your imagination comes to life in vibrant, waxen hues.

How do you melt crayons to pour into molds?
Instructions
- Preheat the oven to 250 degrees Fahrenheit.
- Place peeled and broken crayon pieces in molds. …
- Put silicone mold on a cookie sheet before putting it in the oven.
- Place in oven and cook for 9-11 minutes. …
- Once you see that the crayons have fully melted, pull them out of the oven immediately.
Melting crayons to pour into molds is a captivating process that allows you to transform ordinary crayons into captivating, colorful creations. To embark on this journey, follow these steps for controlled and artistic melting:
Preparation: Gather your crayons, molds, and necessary tools. Choose crayons made primarily from paraffin wax or similar wax types, and select molds made from heat-resistant materials like silicone or metal.
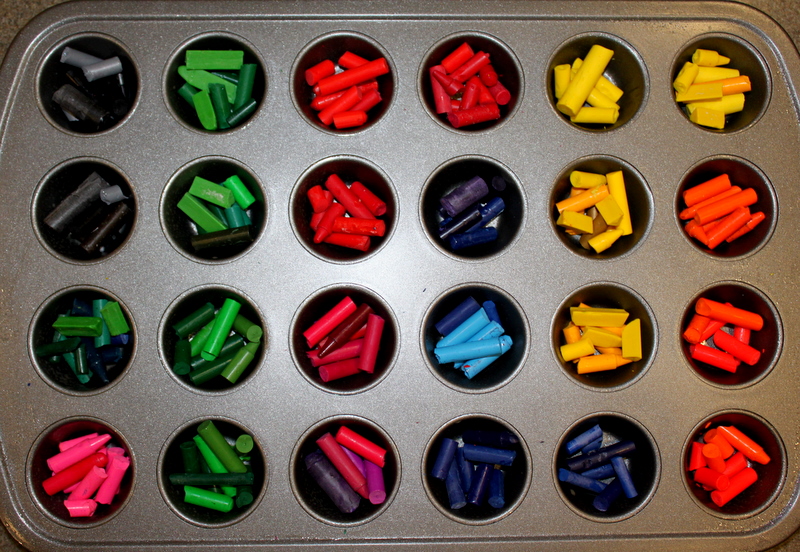
Cutting and Sorting: Break or cut the crayons into smaller pieces to promote even melting and facilitate color blending. Group crayons by color family or desired design.
Double Boiler Method: Fill a pot with a few inches of water and bring it to a gentle simmer. Place a heat-safe bowl over the pot, ensuring it doesn’t touch the water. Add the crayon pieces to the bowl and stir occasionally as they melt.
Microwave Method: Place crayon pieces in a microwave-safe container and microwave in short intervals, stirring between each interval. Be cautious not to overheat the crayons.
Layered Melting: For intricate designs, melt different crayon colors separately. Pour the first color layer into the mold and allow it to cool and solidify before adding the next color.
Precision Pouring: Slowly and steadily pour the melted crayon wax into the molds. Use a small ladle, spoon, or pipette for controlled pouring, especially for fine details.
Cooling and Solidification: Allow the molds to cool at room temperature or in the refrigerator until the crayon wax has fully solidified. This prevents distortion and preserves your design.
Unmolding: Once solid, gently flex or tap the molds to release the crayon creations.
Cleanup: Clean utensils and molds promptly using paper towels, as melted crayon wax hardens as it cools.
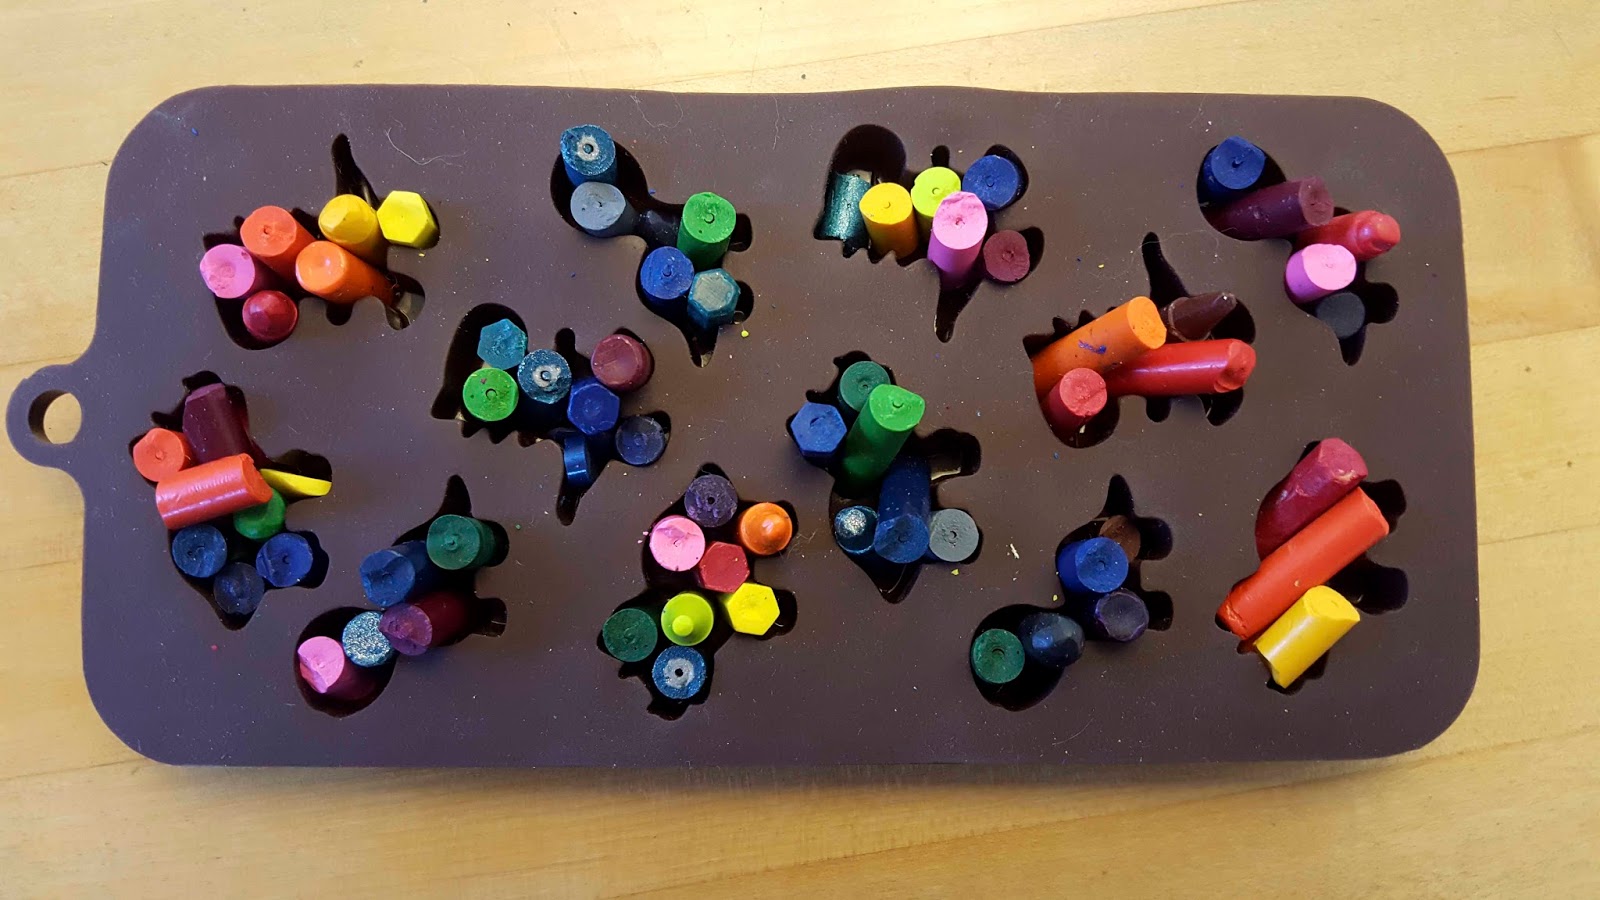
Can crayons be melted in silicone molds?
You can melt crayons in the oven or microwave. You can use silicone molds, muffin tins or even cookie cutters. The next time you are wondering what to do with your old used crayons follow my tutorial on how to melt crayons.
Absolutely, crayons can be melted in silicone molds, offering a versatile and creative way to craft unique and vibrant creations. Silicone molds are particularly well-suited for this process due to their heat resistance and flexibility, which makes releasing the cooled crayon shapes hassle-free.
To melt crayons in silicone molds, begin by selecting crayons made primarily from paraffin wax or similar wax types. Sort and break the crayons into smaller pieces to promote even melting and facilitate color blending. Next, prepare your silicone molds by cleaning and ensuring they are dry and free from debris.
Using a double boiler or microwave-safe container, melt the crayon pieces until they become a liquid. Take care not to overheat the crayons, as high temperatures can degrade the silicone molds.
When the crayon wax is melted and smooth, carefully pour it into the silicone molds. For more intricate designs, consider layering different colored crayon waxes within the molds. Slow and controlled pouring helps prevent spills and ensures precise placement.
Allow the crayon wax to cool and solidify within the silicone molds. Once thoroughly cooled, gently flex or press the molds to release the crayon creations. The silicone’s flexibility makes it easier to extract the shapes intact.
How do you melt crayons without silicone molds?
This is another great alternative to melting crayons in candy molds. Line a baking tray with parchment paper. Lightly spray metal cookie cutters and place them on the tray. Add crayons and pop in the oven!
Melted crayons can be artfully repurposed into captivating creations even without silicone molds. To embark on this imaginative journey, follow these steps for melting crayons without silicone molds:
Prepare Workspace: Set up a clean and well-ventilated area with protective covering to catch any potential drips or spills.
Crayon Selection: Choose crayons made primarily from paraffin wax or similar wax types. Sort and break them into smaller pieces to facilitate even melting.
Heat Source: Utilize a double boiler or microwave-safe container to melt the crayons. A heat-resistant container can be used as an alternative to molds.
Create Wax Art: Place a canvas, sturdy paper, or fabric on your workspace. Melt the crayons as directed, then use a heat-safe tool (like a spatula or palette knife) to drip, spread, or swirl the melted wax onto the chosen surface.
Blow Dryer Method: For a fluid effect, place the canvas vertically and use a blow dryer on a low setting to melt and manipulate the crayon wax.
Cooling and Display: Allow the melted wax to cool and solidify on the canvas or chosen surface. Once hardened, your vibrant artwork is ready for display.
Explore Texture: Experiment with layering, mixing colors, and scraping techniques to add texture and depth to your wax creations.
Safety First: Ensure safety by working in a well-ventilated area and avoiding overheating the crayons or any direct contact with hot wax.
Can you melt crayons in a plastic cup?
When melting the crayons, you can use an old microwavable plastic cup. Heat on the highest setting until the wax is completely melted. Then carefully pour the melted crayon into plastic candy molds, and let them cool for just a little bit. You can speed the process by placing the mold in the refrigerator.
Crayon Selection: Choose crayons made primarily from paraffin wax or similar types of wax. Avoid crayons with added pigments, glitter, or metallic finishes, as they may not melt well or could release harmful substances.
Minimal Heat: Use the lowest possible heat setting if melting crayons in a plastic cup. Slow and gradual melting is essential to prevent overheating the plastic.
Microwave Caution: If using a microwave, use short intervals and closely monitor the crayon melting process. Avoid prolonged exposure to high heat.
Ventilation: Ensure proper ventilation in the area where you’re melting crayons to minimize the risk of inhaling any fumes that may be released.
Protective Gear: Wear gloves and safety goggles to protect your hands and eyes from potential splatters.
One-Time Use: It’s advisable to use the plastic cup for melting crayons only once, as the cup may become weakened or deformed after exposure to heat.
Alternative Containers: Consider using heat-resistant containers made from glass or metal if you’re concerned about the limitations of plastic cups.

What types of crayons are best suited for melting into molds?
Crayons made primarily from paraffin wax or a similar type of wax are best suited for melting into molds. These crayons have a higher wax content, which allows them to melt and solidify well, making them ideal for crafting and creating new shapes. Crayons labeled as “non-toxic” are generally safe for melting, but it’s always a good idea to double-check the packaging to ensure they are suitable.
It’s important to note that crayons with additional pigments or additives, such as glitter or metallic finishes, may not melt as smoothly or evenly, and their colors might not blend as expected. Stick to basic, solid-colored crayons for the best results.
If you’re planning to melt crayons into molds, consider using old or broken crayons that you might have lying around. This is a great way to repurpose crayon bits and create new, exciting shapes and colors.
Before melting any crayons, it’s recommended to test a small sample in your chosen mold to ensure that the crayons melt properly and the colors remain vibrant. Experimentation and creativity are key when working with melted crayons, so don’t hesitate to try different combinations and types to achieve the desired results.
What safety precautions should be taken when melting crayons into molds?
When melting crayons into molds, it’s important to prioritize safety to ensure a smooth and risk-free crafting process. Here are some safety precautions to consider:
Adult Supervision: If children are involved in the process, ensure they are supervised by an adult at all times, especially when handling heat sources.
Well-Ventilated Area: Work in a well-ventilated space to prevent inhaling fumes that may be released during melting. Open windows or use a fan to keep air circulating.
Heat Source Safety: Use a suitable heat source, such as a microwave or a double boiler, and follow the manufacturer’s instructions for proper usage.
Avoid Overheating: Do not overheat crayons, as excessive heat can cause them to catch fire or release harmful fumes. Use low to medium heat settings and monitor the melting process closely.
Protective Gear: Consider wearing gloves to protect your hands from hot wax and using safety goggles to shield your eyes from potential splatters.
Mold Safety: Choose molds made from heat-resistant materials, such as silicone or metal, to prevent them from melting or deforming during the process.
Avoid Mixing Materials: Only melt crayons made from paraffin wax or a similar type of wax. Avoid crayons with additional pigments, glitter, or additives, as they may not melt properly or release harmful substances.
Cooling Period: Allow the melted crayons to cool and solidify before handling the molds or removing the newly formed shapes.
Fire Safety: Keep a fire extinguisher nearby and be prepared to respond in case of any unexpected accidents or fire hazards.
Cleanup: Clean up any spilled wax promptly and dispose of materials properly to avoid potential hazards.
By adhering to these safety precautions, you can enjoy the creative process of melting crayons into molds while minimizing risks and ensuring a safe crafting experience for yourself and others involved.
What are the essential tools and materials needed for this creative process?
To successfully melt crayons into molds and create vibrant and unique shapes, you’ll need a few essential tools and materials. Here’s a list to help you get started:
Crayons: Choose crayons made primarily from paraffin wax or a similar type of wax. Avoid crayons with added pigments, glitter, or metallic finishes.
Molds: Select molds made from heat-resistant materials, such as silicone or metal, in the shapes and sizes you desire.
Heat Source: Depending on your preference and safety measures, you can use a microwave, a double boiler, or a hot plate for melting the crayons.
Microwave-Safe Container (if using a microwave): Use a microwave-safe container to melt the crayons. Avoid using plastic containers that may not withstand the heat.
Stirring Utensil: A heat-resistant spoon, popsicle stick, or dedicated utensil for stirring will help mix melted crayons and achieve desired colors.
Protective Gear: Consider wearing gloves to protect your hands from hot wax and safety goggles to shield your eyes from potential splatters.
Heat-Resistant Surface: Place your molds on a heat-resistant surface to protect your work area and avoid damage.
Paper Towels or Rags: Have these handy for wiping up spills or cleaning utensils.
Oven Mitts or Pot Holders: Use these to handle hot containers and molds safely.
Timer: Keep track of melting and cooling times to ensure safety and desired results.
Scissors or Craft Knife: Use these to cut crayons into smaller pieces for melting.
Optional Additions: If desired, you can add fragrance oils, essential oils, or other safe additives to your melted crayon mixture.
Remember to work in a well-ventilated area, follow safety precautions, and test your process on a small scale before creating larger or more complex pieces. The essential tools and materials will help you embark on a creative and enjoyable journey of melting crayons into molds to craft beautiful, colorful creations.
How can controlled melting be achieved to create precise and intricate designs?
Controlled melting to create precise and intricate designs when melting crayons into molds requires careful attention to heat, timing, and technique. Here’s how you can achieve controlled melting for your crafting endeavors:
Preparation: Cut or break the crayons into smaller pieces. This allows for more even melting and better control over color combinations.
Temperature Control: Use a heat source with adjustable settings, such as a hot plate or double boiler, to regulate the temperature. Start with a low heat setting and gradually increase if needed.
Monitor the Melting: Keep a close watch on the crayons as they melt. Stir gently with a heat-resistant utensil to promote even melting and prevent scorching.
Layering Colors: To achieve intricate designs, melt different crayon colors separately and layer them in the mold. Allow each layer to cool and solidify before adding the next.
Gradual Pouring: Pour the melted crayon wax into the mold slowly and steadily. This helps prevent air bubbles and allows you to control the placement of the wax.
Precision Tools: Use precision tools like toothpicks, skewers, or small brushes to manipulate the melted wax within the mold. This is especially useful for creating detailed designs.
Cooling and Solidification: Allow each layer to cool and solidify before adding additional layers. You can speed up the process by placing the mold in the refrigerator or freezer for a short time.
Finishing Touches: Once the design is complete and the crayon wax has fully solidified, carefully remove the finished piece from the mold.
Practice and Patience: Achieving precise and intricate designs may require practice. Experiment with different techniques and color combinations to refine your skills.
Cleaning Tools: Clean your utensils and molds promptly after each use to prevent wax buildup and ensure accurate designs in future projects.
Remember, controlled melting is a skill that improves with practice. Be patient, take your time, and don’t be afraid to experiment and learn from each crafting session. With practice, you’ll be able to create stunning and detailed designs using the controlled melting technique.
Conclusion
In the colorful realm of melting crayons into molds, you’ve embarked on a captivating journey that fuses creativity, artistry, and craftsmanship. Through careful selection of materials, meticulous attention to safety, and the art of controlled melting, you’ve unlocked the potential to transform ordinary crayons into extraordinary works of vibrant, sculpted beauty.
With each molten pour and delicate stroke, you’ve witnessed the transformation of wax into intricate designs, breathing life into your imagination. The process of melting crayons into molds is more than a creative endeavor; it’s an exploration of possibilities, a celebration of artistry, and a testament to your ability to shape beauty from the simplest of materials.
As you gaze upon your finished creations, from elegant swirls to dazzling hues, remember that the journey of melting crayons into molds transcends the tactile experience. It stands as a reminder that creativity knows no bounds, and within the dance of melting colors lies a tapestry of endless inspiration, waiting to be explored anew with each crafting venture.